Saturday, April 12, 2014

Training Your Dog for the Trail: How to mountain bike with your dog

GIRL MOUNTAIN BIKING WITH DOGS ON TRAILWhat dogs were meant to do: bound through giant snow drifts, chase squirrels off-trail, and jump into mud with the enthusiasm of kindergartener at recess.

What dogs are generally not so good at: staying on-trail, staying on-course, and minding their own furry business. 

As much as we would love for our dogs to meander freely down congesting trails and paths, we all know that when a dog is off-leash, there's a good probability of rodent-hunting, tail-sniffing, and puddle diving.  So, we opt to keep them on-leash instead. 

If the requirement for your dog to be on-leash has you limiting your trail activities, don't fret!  With the right dog gear for the trail and a little practice, you can enjoy the trail with your dog any way you like it: on foot, on bike, on skis, and on snowshoes.

To help you along your adventure, consider these Rad Dog tips for taking your dog on the most difficult of canine trail adventures: mountain biking.

Tips for Training Your Trail Dog to Mountain Bike With You:

1. Train your pup early.  The saying, "can't teach an old dog new tricks" maybe incorrect, but there's some truth to the fact that dogs are easier to train initially than to retrain when they are older.  So, if you can, start leash training your dog at a young age. 
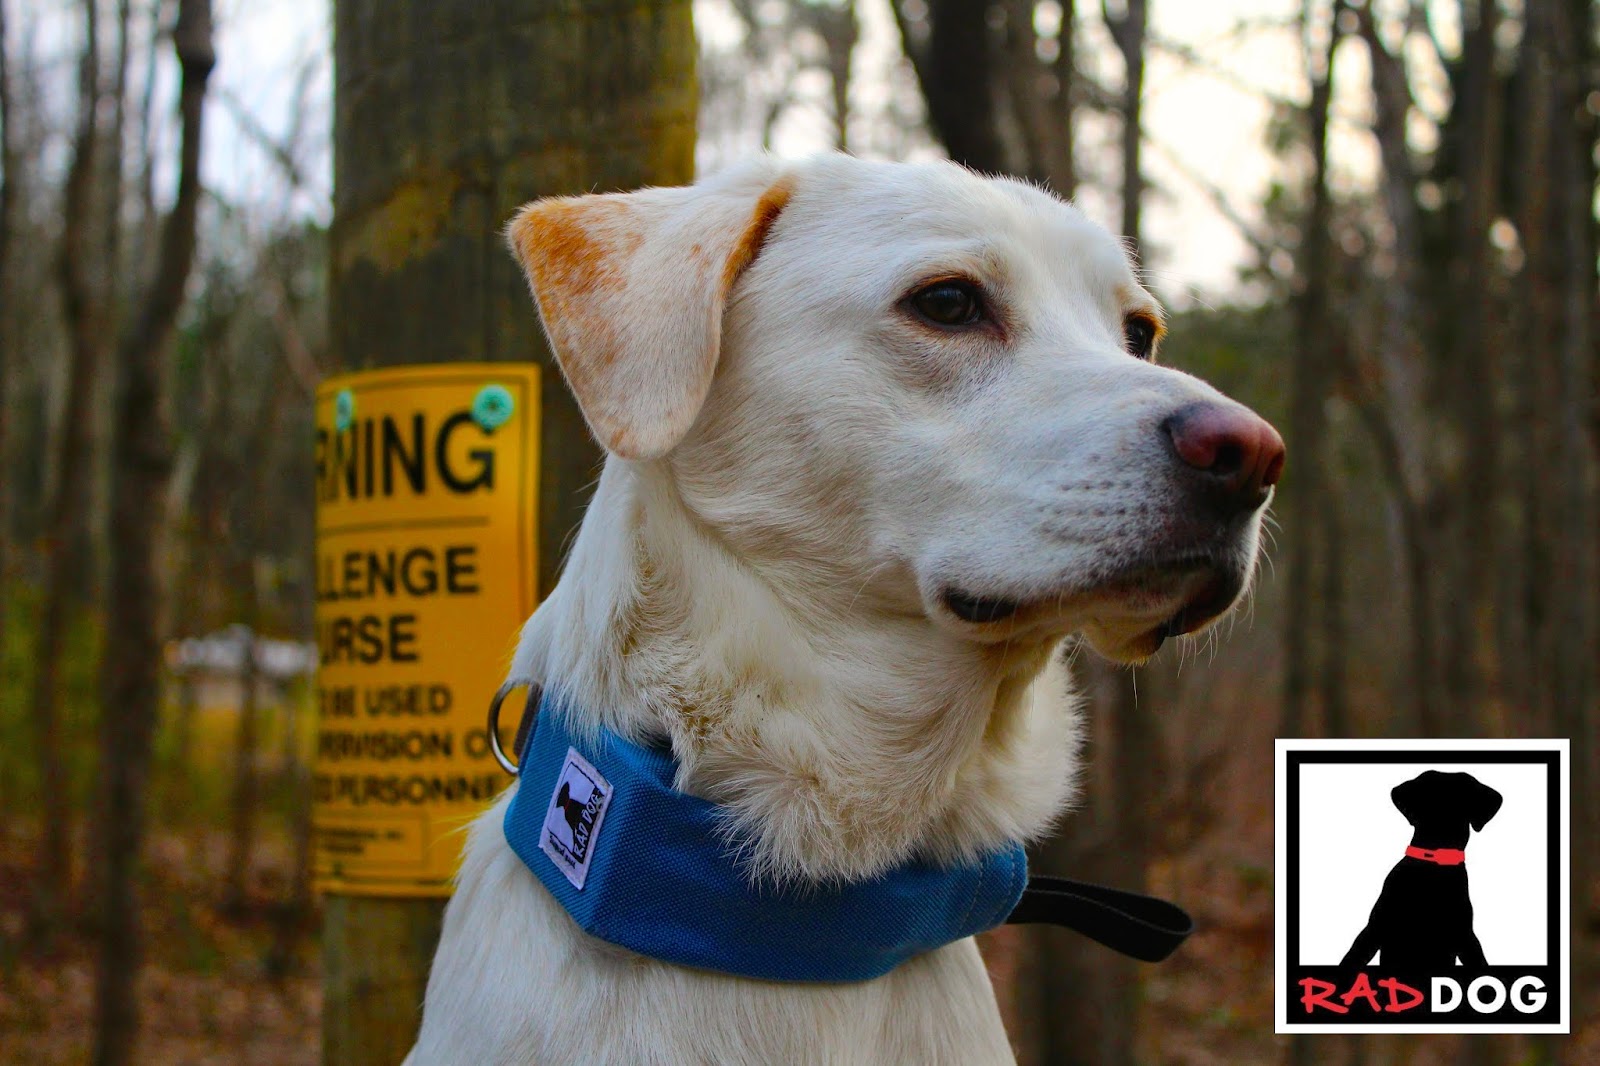
dog LEASH AND COLLAR IN ONE 2. Leash train using baby puppy steps. Leash training should start out slow and short while your puppy's bones are developing. Even with older dogs, there is a "break-in" period where your dog needs to get in shape before a long trail adventure. Start by walking, then move to a light jog, working your way up to a full run.

3. Switch to a short leash and bike. When your pup is ready, find a quiet place free of congestion to train your dog to run with your bike.  Using a short leash, run your dog alongside the gutter-side of your bike, about a foot away from your handlebars as you pedal along. Tug the leash anytime your dog drifts away from the bike, paying close attention as you approach other people, dogs, cars, and other distractions.

4. Get verbal.  As you train your canine to run alongside your bike, be sure to give them verbal cues as well as physical cues from pulling on the leash.  Words like "Haw!" "Go!" "Right!" "Easy!" and "Whoa!" all help communicate to your dog the correct response. This also helps form a pattern of behavior and command that is useful both on, and off-leash.

mountain biking with two dogs how to 5. Test drive on a wide, empty trail. After you have established a consistent pattern of behavior where the dog is able to accompany you alongside the bike in a predictable manner, you can give a wide trail a go.  Select a low-traffic, easy, and wide trail where the dog can run alongside you with few distractions.  After a lot of practice and consistency, your dog may be ready to run with you off-leash. A dog collar-and-leash-in-one, such as the Rad Dog Release 'N Run can offer you the flexibility of leash when you need it, without the added hassle.  When a leash is required, simply pull the handle on the collar of the dog, freeing the leash for use.  More utility, less gear!

6. Time to go singletrack. As you and your dog get more familiar with trail riding together, you will eventually want to teach them to run behind you so you can ride singletrack. This is done easier if your dog is on voice command because you can yell "heel" as the dog heads towards your back tire.  One of our sources suggests this approach to training your dog to run singletrack (though we have not personally tried this): "Attach a five-foot pole to the leash. Start with the dog alongside you. Say "Heel!" and move the pole back to position the dog behind your rear tire."

There are a variety of great resources out there from avid mountain bikers who take to the trail with their dog regularly.  For more information, check out this article by Utah Mountain Biking, "Training Your Trail Dog."

Tuesday, March 11, 2014

How To Clean Your Dirty, Mud-Soaked Dog

Bucket-headed dog
What we love about dogs: their mud-slinging, trail ditching, wreckless abandon.  What we dislike about dogs: their mud-slinging, trail ditching, wreckless abandon.

Whether you live in the wet valley of the Pacific Northwest (like we do), the high altitudes of the Rockies, or the cloudy bays near the ocean, there is one thing that every dog owner is plagued by in the spring: mud.  It just comes with the trail territory.  And the more fun your dog has, the muddier they get!

Just because your dog gets muddy, doesn't mean they should be confined to the yard during mud season, it just means a little more effort on your part to keep them clean.

For those of us who consider a dip in the lake or a run through a sprinkler "bath time," we thought we would post the appropriate way to clean your dirty, muddy dog.

How to Clean a Dirty Dog

1. Prepare a workspace.  Depending on the size of your dog (and bathroom), you may decide the best place to clean your dog is outdoors.  If this is the case, prepare the area with a source of water (like a hose), a bath area (such as a shallow, plastic pool), a bucket of warm water, and the necessary tools: towels, soap, and brushes.

If you determine that indoors is best for dog washing, prepare your area with the essential tools, and fill the bath or sink with enough water to reach your dog's bend in their hind legs.

If your dog dislikes water, you may need the help of another set of hands, and leash to help hold your dog in place.

2.  Brush the dog's coat thoroughly.  This will help remove excess hair and dander.  This is also a good time to check your dog for fleas and ticks. If the dog is still wet or muddy, you may have to forgo this step.

3. Have the dog enter the bath or pool.  Have the dog enter (or jump wildly!) into the prepared bath or pool.  The water should be lukewarm if possible to help regulate body temperature and stress level. Rinse the dog throughly using buckets, the hose, or a hand-held shower head, whichever disrupts your dog the least.  Work the water into the fur of the dog's coat while you rinse.  Depending on how dirty your dog is, you may have to drain and refill the bath or pool at this time.

4. Shampoo and condition the coat.  Pick a shampoo based on your dog's needs.  Some dogs are more sensitive to product than others, and are more prone to irritation (click here for a recipe on making your own homemade dog shampoo).  Start at the neck, creating an invisible necklace of shampoo around the neck, and work your way down the dog's back, massaging the shampoo into the dogs coat and undercoat.  Work your way down the legs and hindquarters, under the belly, down the tail, and up towards the head, be sure to get into the creases, rolls, and folds of the skin.  This is especially important around the neck area.

5. Wash the face and head.  Using a cloth and warm water, work the shampoo into the neck and head of the dog, using circular motions.  You can carefully wash around the ears and snout, but be careful not to get the shampoo into the dog's eyes, ears, nose, or mouth. Many dogs have ears that are prone to infection, so it's very important to avoid getting water into the ear canal.

6. Rinse well.  The best way to avoid skin irritation is to rinse your dog extremely well. Using a bucket, hose, or shower head, rinse and massage simultaneously until the water runs clear and free of soap.

7. Air Dry. If you are one of the lucky ones, you can train your dog to shake themselves dry before they exit the bath.  But most dogs will wait to do this until they are within inches of you and your furniture.  So, starting with their back, massage them with a towel, working your way down their back, belly, and legs. Give their paws a good rub (especially between the toes) to get any dirt you may have missed, as well as give them a clean paw to run through the house with. Also pay good attention to the ears, which should be dried thoroughly to prevent infection.

Some like to blowdry their dog, but most Rad Dogs are the "air dry" type.  A good brushing and a couple hours in the atmosphere ought to be all you need to style your dog.

As much as you would probably like to avoid the smell of wet dog from permeating your home, if you let a wet dog outside, they will most likely find the dirtiest patch of yard to roll their freshly-cleaned self in. So, consider putting them in the garage or letting them roam around the house until they are dry.

And that's how you clean a dirty dog, Rad Dog style!

Saturday, February 15, 2014

Trail Tips and Winter Trail Etiquette for Dog Owners


One of the best benefits to winter activities with your dog is that most places have looser leash laws during the winter season, which means more unrestrained running, jumping, and snow dancing for your dog.

 If you are new taking your canine on these cold-weather adventures, there are few trail courtesies you should know about.  Whether you are snowshoeing, cross-country skiing, or just enjoying a cold-weather hike, keep in mind that the same courtesies exist on trails and outdoor spaces during the winter months, even if they are covered up with snow.

Winter Trail Etiquette and Tips for Dog Owners:

1. Leash Laws Don't Trump the Golden Rule. If even local leash laws do not require the use of a leash, if you have an excitable, boisterous, or space-invading dog, keep them on-leash when other trail-goers and dogs are present. A good rule of thumb is to leash up any dog not trained on voice command, no matter what time of year, or how empty the trails.  For dogs on voice command that like to wander off-leash on busy trails, consider a collar and leash in one, such as the Rad Dog Release N Run, which allows your dog to be "on leash" at a moment's notice, without forcing you to hold the leash when they are frolicking about.

2. "Leave No Trace" Goes Double for Dog Poop.  Have you ever seen a dog-friendly trail after the first snow melt?  It's not pretty! As tempting as it may be to kick the poo to the side of the trail or ignore the incident (rather than gallivanting through the snow in search of the stinky pile), leaving dog poop behind is just not cool. And Rad Dogs must be cool. So don't forget the dog poo bags...it's your doggy doodie duty!

3. Don't Leave Your Dog Behind. Dogs were meant to enjoy the trail with us, so don't leave them behind in the car.  They could be disruptive to others at the trail head or get too cold/hot in the car, so if you don't want them to come along for the hike, snowshoe, or ski, don't bring them at all.

4. Bring Lots of Water.  Even in the cold weather, dogs can become dehydrated, so make sure to bring plenty of water and keep your dog hydrated.  We recommend "traveling light" with the Rad Dog Pocket Dog Bowl.

5. Think Like a Dog. There are so many distractions on the trail--other dogs, small children, pedestrians, horses, and wildlife--it is important that you keep your dog in control at all times.  Even the best behaved dogs can act out of character if they encounter something new. Don't neglect bringing a leash just because the trail does not require one, and keep in mind that most trails require leashes be no longer than 6 feet long.

6. Know Your Dog's Limits. Just like humans, dogs need to build up stamina and endurance. Be sure you are aware of your dog's physical abilities before attempting a new trail. Check to make sure their paws, pads, and nails are in good shape before heading outdoors.

7. Be aware of How Your Dog's Presence Affects Others.  Did you know that a long leash can "close-line" a mountain biker? Or that a dog can spook a horse, causing injury to its rider?  As a responsible dog owner, it is important to understand the consequences of your decisions when handling your dog.  Stay alert, maintain control, and keep your dog on the trail and within your eye line at all times.


Friday, March 8, 2013

Standing out from the crowd

Standing out from the crowd.

  At Backcountry Essentials 
Here's the reality - as cool and innovative as I think our Release N Run is, a lot of people just don’t get it. As the product hangs on the retailers' walls next to the hundreds of other “dog collars,” people continuously pass it over, thinking it's a shock collar, a collar for a very large dog, or some type of collar irrelevant to them because they don't know what it is.

The truth is it’s probably something they’ve never heard of and therein lies the challenge of getting our collar to stand out in a sea of collars. We know we need people to see it in action so they can realize that it's so much more than a collar - it’s a collar with a built-in leash and that can be life changing.

We’ve brainstormed several ideas to address this issue, but until meeting with Chris, the owner of Backcountry Essentials here in Bellingham, we weren’t sure of the best option. Chris, however, made our decision easy. I asked him some questions about the product and how it was doing in his shop, and he said, “it’s doing well, but is kind of off the customers' radar.” He stated that they often have to show it to customers to get them to realize what the product is. He suggested creating some type of product display.

If the shoe fits. . . This suggestion fit with our previous ideas and seemed like a perfect solution to our problem. When asked what he thought about a display dog that would both showcase the Release N Run to his customers and double as product storage, Chris suggested we try it out.

8th grade flashback. . . So, I headed back to the Rad Dog office (I mean our garage) to put my 8th grade shop skills to the test.  Here is what came from those mad skills - a dog that both demonstrates how the Release N Run works and acts as product display.


Option # 1 on the left and option # 2 on the right

With Collar displayed

Our first dog is prominently displayed at Backcountry Essentials right as you walk in the door. See the picture at the top. After it’s there for awhile, I’ll let you know how it goes.

Your ideas welcome:
We are always looking for ideas to help people understand our product; if you have any suggestions/ideas please let us know by commenting below or sending us an email by using the contact us page of our website.

Looking for new stores:
Additionally, if you own a store or know of a great store that the new Rad Dog display and the RNR would do well in, please let us know by commenting below or sending an email from our contact us page.

Next Blog
If you have any interest in how we made this dog, check back for our next blog post. We'll give you the details. You never know, you, too, might want to make one for your kids or as a storage rack for your dog’s gear.

Thanks for reading --

Saturday, December 29, 2012

Forgot a gift for your dog loving friend?

Did you forget to buy any Christmas gifts for your dog loving friends? Or, perhaps you didn't have time to finish your Christmas shopping before Christmas.

Here's a perfect, thoughtful, fun gift: a homemade dog ID tag. 

I originally found this idea on Martha Stewart's Website, but after making a few from her template, I decided to design my own. If you're in a hurry, use the template off of Martha's Stewart's site. If you have some design skills, have a try yourself.

Here's what you need.
  • Shrinky Dinks shrinkable plastic. I bought mine at Michaels. Look for the type that works with your printer. If you have a coupon for Michaels, this project will be even more economical. 
  • Printer
  • Hole punch
  • Scissors (decorative to make these have more flair)
  • Brown paper bag
  • Cookie sheet
  • Oven, conventional or convection

Directions:


  • Download or design your own template. I designed mine in Adobe Illustrator. The large tags were about 2.5" in diameter. Lighter colors seemed to work best. 
    Template designed in Adobe Illustrator


  • Print your template onto the Shrinky Dink plastic. Be sure to adjust your print settings to what's recommended by the printable plastic you're using.

  • Cut out the designs with regular or decorative scissors


  • BE SURE TO PUNCH HOLES IN THEM BEFORE BAKING (I had problems remembering this step). A regular hole punch will be sufficient.

  • Preheat the oven to the recommended temperature, between 275-325 degrees. I used 290 degrees.

  • Cut a grocery bag that is large enough for the cut tags. Place it on a cookie sheet and place the shrinky dink with the printed side up.

  • Bake for 3-5 minutes. The shrinky dink goes through a crazy transformation where it curls and then lays flat again. If the edges touch each other, you will not get them apart. This happened a few times for me when the oven temperature wasn't high enough.

  • Take the tags out of the oven and press flat. We used a notepad and pressed our weight on them for about 30 seconds. With a bit of luck, you'll have a cute, practical gift for your dog loving friends.

Sunday, December 23, 2012


 Homemade Dog Biscuits. A Great Holiday Treat 


Ok. So you’ve bought every toy, treat, and gizmo for your furry best friend and you’re wondering what to put in his stocking. Or maybe you’ve been looking for a unique gift for that friend or family member’s pup. How about making your best friend some homemade dog treats or giving your friends and family an easy to make dog treat mix in a mason jar, with a dog or bone shaped cookie cutter attached?

 In this blog post, I provide a delicious recipe for dog treats and share how to package them so they look extra special/cute for your friends and family.

We used the recipe from the following site: http://www.thekitchn.com/cookies-for-canines-homemade-d-135078 

How long will it take?
The first question will probably be how long will it take to make these cookies for your dog or how long will it take to put all the ingredients into a mason jar.

The answer: not very long.
If you choose to go for the Mason jar method it will take about 25-30 min.
To bake the cookies and put them in a cute doggie bag will take less than an hour.

The Procedure
First, decide which gift you want to give. If for your own pup, then obviously you’ll just make the treats, and put them in a cute bag under the tree (if they make it that far). But if you want to save some time or give this gift to multiple people, then the Mason jar and cookie cutter is a great option.

Mason Jar and Cookie Cutter Option 
Decide on what recipe you want to use. The one we use to make the cookies in this blog is shown below. We have also included some links to other great recipes including some vegan and wheat free options.
                                    What you’ll need:
  

The Recipe:
If you’re baking the cookies
  • Preheat the oven to 300°F. 
  • Lightly grease a couple of baking sheets, or line them with parchment paper.
If you’re going the Mason jar route, put the following ingredients in a bowl one at a time and then pour each ingredient individually into the Mason jar to achieve the layered look shown in the pictures. It also helps if you use some type of funnel or a piece of paper with a crease in the middle to transfer the dry ingredients into the jar.

Ingredients:
  • 1 cup Whole Wheat Flour 
  • 1 cup White Flour, 1/2 teaspoon salt, 1 tablespoon dried parsley or 2 tablespoons chopped fresh parsley – stir these ingredients together before putting in mason jar. 
  • 1 cup rolled oats, regular or quick 
  • 1/2 cup Baker’s Special Dry Milk or nonfat dry milk 
After you’ve put all the ingredients into the jar, find a cool piece of fabric and use that as the lid instead of the flat metal part of the lid. Put the fabric on the jar and screw the threaded part of the lid over the fabric.

Baking Instructions

Next get a card large enough to write the baking instructions on them.
  • Preheat oven to 300F •
  • Pour dry ingredients in to the large mixing bowl •
  • Add 2 large eggs 
  • 1 cup peanut butter 
  • Stir to combine 
  • Add 1/2 cup + 1-2 tbsp. water stir 
  • Bake for 40-60 min or until brown and crispy
 Attach card and cookie cutter to top of the jar with the raffia or ribbon if giving the Mason Jar or put your biscuits in a homemade bag. 

Sunday, July 8, 2012

Scared of Thunder

If your dog is like many, the Fourth of July is pure torture and summer thunderstorms make your dog pant harder than after a 2 hour mountain bike ride. One approach is to desensitize your pet to the sounds of thunder. Buy a cd of storms and play it softly. You might try pairing the noise with a treat or favorite toy. Gradually increase the volume over time. If this doesn't help and your dog is so petrified that the house is being torn apart or your dog is harming himself, contact a vet.